Deleting a Proforma Invoice
To delete a Proforma Invoice, complete the following steps:
- Expand the Module Menu and click the Accounting module hyperlink to open the Accounting module.
- Expand the Scheduled Processes group item to see the list of available action items.
- Click the Delete Proforma Invoices hyperlink.

Delete Proforma Invoices Hyperlink Located in the Scheduled Processes Group Item This will open the Delete Proforma Invoices page.
- Enter the desired search criteria in the Invoice Search Criteria section of the page to locate the Proforma Invoices you wish to delete.
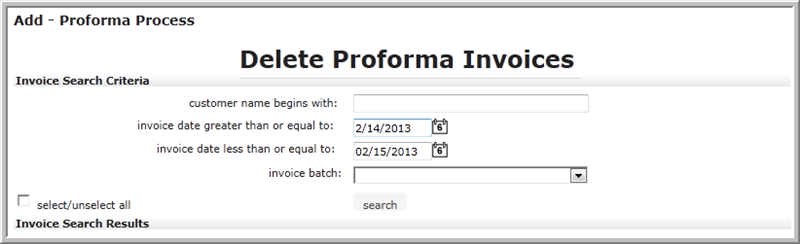
Invoice Search Criteria Fields Completed - Click the search button.
The Invoice Search Results section of the Delete Proforma Invoices page will update with the Proforma Invoices that match your criteria.
- Click the check box(es) next to the Proforma Invoice(s) you wish to delete. Click the select/unselect all check box to select all of the Proforma Invoices returned in the search.
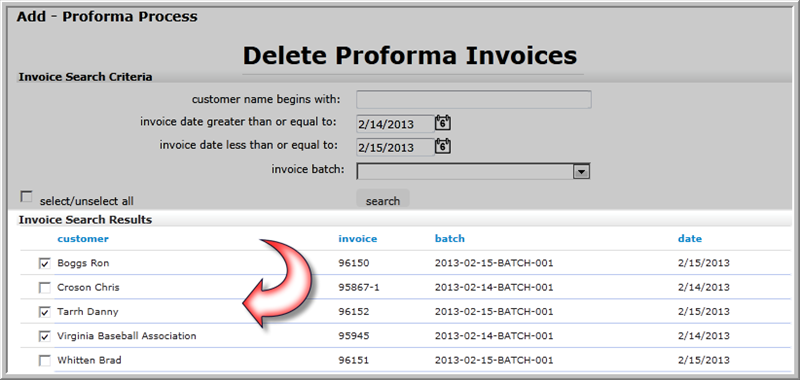
Proforma Invoices to be Deleted with their Check Boxes Selected Once the invoices are selected, they can be scheduled to be processed.
- Click anywhere in the run task datetime field to expand the datetime picker.
- Click on the date you wish the Proforma Invoice Delete scheduled process to run.
- Select the time you would like this process to run by using the Time drop-down menus.

Set the Run Date and Time for the Delete Proforma Invoices Process - Click the OK hyperlink in the lower-right corner of the datetime picker to select the date and time you have chosen.
To run the process immediately, click the Now hyperlink located next to the run task datetime field.
Note: The deletion process takes approximately two minutes after the Now hyperlink is clicked. This delay is dictated by the ScheduledTaskDefaultDelayMinutes system option.
- To run this process after a previously scheduled task, expand the execute after task drop-down menu and select the scheduled task you would like this process to follow.
- If you would like a confirmation e-mail to be sent upon completion of this task, expand the notify template drop-down menu and select the e-mail template to be used in the confirmation e-mail.
- In order to receive the confirmation e-mail, you must enter a valid email address in the notify e-mail field.
- Click the check boxes next to the notify conditions you wish to trigger the confirmation e-mail. Leaving all of the check boxes unchecked will not generate a confirmation e-mail.

- Click the Save button.
This will take you to the Scheduled Process Profile page that displays the details about the scheduled task.
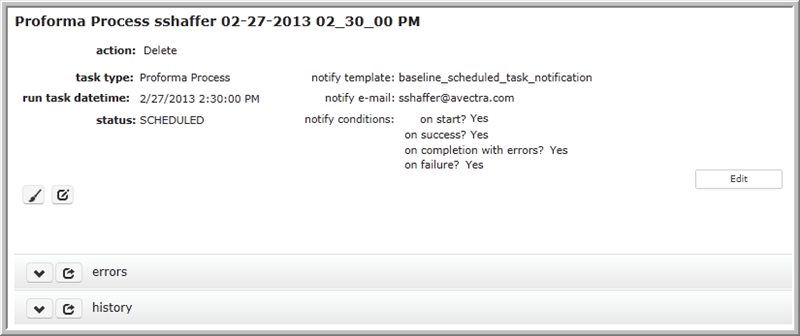 Scheduled Process Profile Page for the Delete Proforma Invoices Scheduled Process